Data Reconciliation Tutorial
This Tutorial
This tutorial assumes you have already have the skills taught in the previous tutorial here.
For additional information, you can look at the examples in the model directory in ORQA.
Creating Your First Reconciliation Task
1. Create A New Folder
Right-click on Model in the model window, and select New > Folder. A popup window will appear and you can enter a folder name (e.g. RecFolder) and click Finish.
2. Create Your Web Task
Right-click again on the folder you just created and select New > Task. A popup window will appear and you can enter a task name (e.g. myRecTask) and click Finish.
3.Downloading The Example Data Files
In this tutorial we will reconcile data stored in two different formats, one will be an Excel file (.xlsx) and the other a CSV file (.csv). Start by downloading the Excel file here and the CSV file here (if you have the Google doc’s app installed right click the link and select “Save as” to save the file).
3.Read Your Data Files
In the “Toolbox” window select the “Data Input/Output” category from the operation categories that are available. Double-click on the “Read from Excel” operation in order to add it to your task (you can also drag-and-drop it).Select as the input parameter the Excel file with the sample Data (downloaded in the previous step).
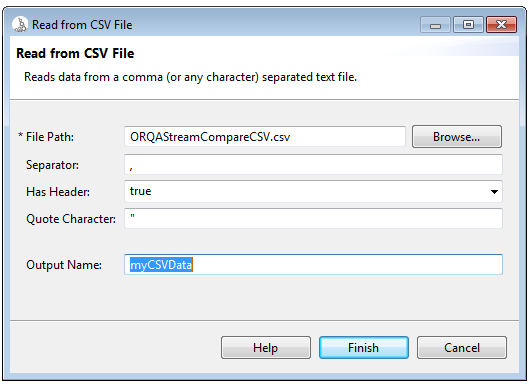
Second, you will need to add the operation “Read from CSV File” from the same “Toolbox” category.In the parameters for that file select the path for the file you downloaded in the previous step. The rest of the parameters leave them with the default values.
4. Assigning Names To Your Data
In ORQA you can name the output of an operation to use that data in a following operation. This is necessary when using some operations such as Compare Table. You can assign the data a name by selecting a name in the “Output Name” parameter.
In the task editor Panel, select the “Read from CSV File” operation and write an output name.
Also, don’t forget to assign a name to the Excel File as well.
5. Add Compare Tables Operation
In the “Toolbox” window select the “Data Reconciliation” folder, then add the “Compare Tables” operation to your task.
Stream comparer will have the following parameters compares two streams of data, The streams of data are called the left and right. In this operation will we call the data we named earlier. Fill in your the parameters like this.
Configure the operations parameters with:
| Parameter | Description |
|---|---|
| Left Name | MyCSVData (use the output Name you assigned in the previous operation) |
| Right Name | MyExcelData (use the output Name you assigned in the previous operation) |
| Key Columns | ID Number (this is case sensitive) |
| OutPut Format | 1 output line per pair of records |
| Left Title | From CSV |
| Right Title | From Excel |
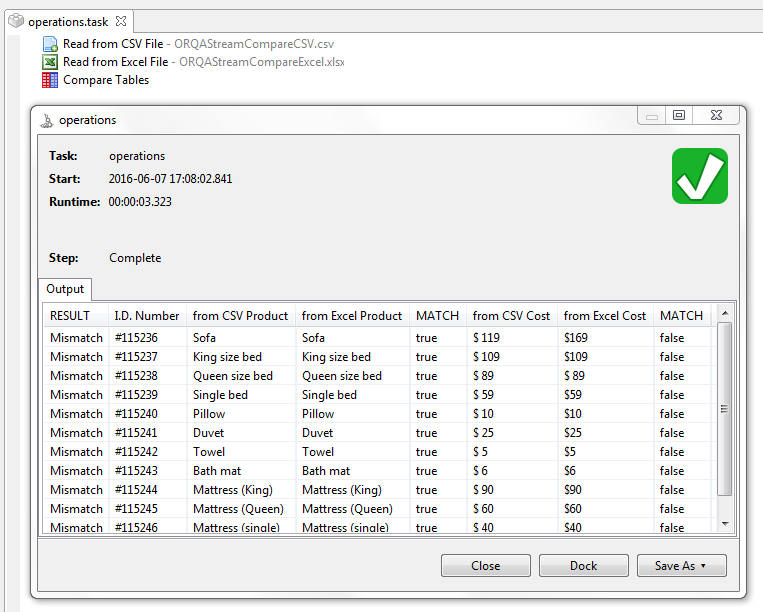
6. Run The Task
After running the task you can look the output results. You will see that the first column is a new column called RESULT. This column informs you as to whether that row reconciled correctly. This output is determined by the “Output Format” parameter.There are multiples options for the output format, therefore, try rerunning the task with the other options so that you get an idea for possible outputs for the stream comparer.
Learn More
You can learn to use ORQA for web automation here.
Technical users can learn to use ORQA in headless mode here.