Your First ORQA Web Task In Three Minutes
Using This Tutorial
This tutorial assumes you have already have the skills taught in the previous tutorial.
Running Web Tasks
Before running this Tutorial check that you have Firefox installed.
ORQA has advanced Web automation abilities, However, in this Tutorial we will only look at the most basic features.
Creating Your First Automated Task
1. Create A New Folder
Right-click on Model in the model window, and select New > Folder. A popup window will appear and you can enter a folder name (e.g. webFolder) and click Finish.
2. Create Your Web Task
Right-click again on the folder you just created and select New > Task. A popup window will appear and you can enter a task name (e.g. myWebTask) and click Finish.
3. Add The ‘Start Session’ Operation
In the ‘Toolbox’ window select the ‘Web’ folder. From the operations that are available below the folder double-click on the ‘start session’ operation in order to add it to your task (you can also drag-and-drop it). Now If you click the ‘Run’ button, a new browser will open, however, this is not necessary yet.
4. Select The URL To load
In the ‘Toolbox’ window select ‘Open URL’ and add it to your account. In the properties window you should see a text field marked URL. In this text field enter ‘www.facebook.com’.
5. Have A Test Run
Click the Run Button and observe ORQA load a browser and navigate to the facebook home page.
Automatically Logging Into a Website
Opening up a Web page is of limited use, however, using ORQA you can also interact with Web pages.
6. Finding An XPath
To do this we need four things, the first two are our username and password - in this case ‘Username’ and ‘Password’. The third and fourth things are the XPaths for the username and password field.
An XPath is simply an identifier for each element of a web page (elements are the components which make up a web page). The easiest way to find one is using the Chrome browser. Using Chrome follow these steps.
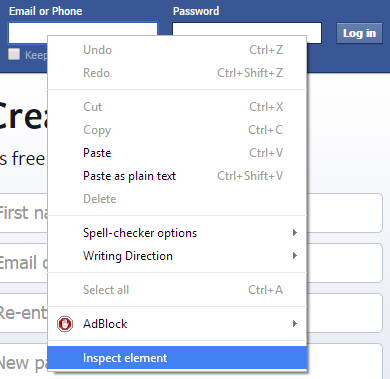
(1) Using CHROME, open the web page you want to automate.
(2) Right click the text field you want to input data into and select ‘Inspect element’.
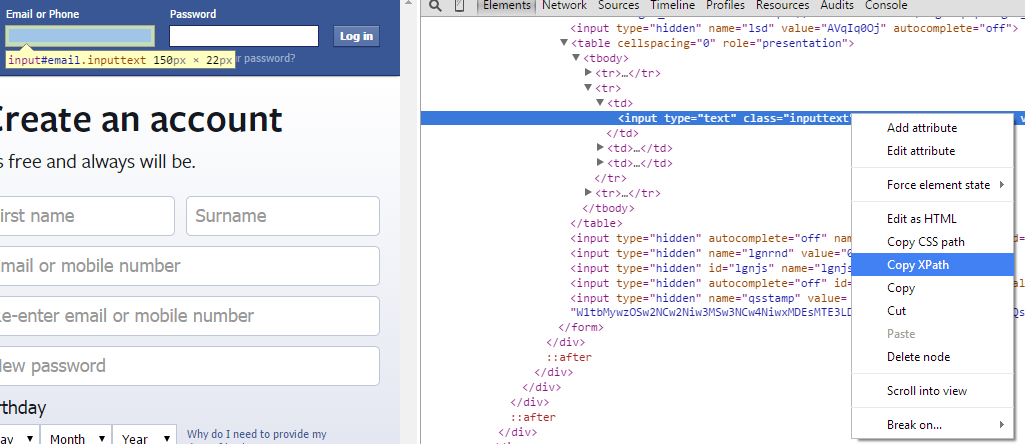
(3) A small window will appear with a small highlighted section. Right click that highlighted section and select ‘Copy XPath’. You will need to paste this value in the next step.
7. Using The Set Value Operation
In the Toolbox window find the ‘Set Value’ operation in the ‘Web’ folder. Add two “Set Value” operations to your task (make sure you add the “Set Value” from the Web folder and not the Java folder).
Use the first ‘Set Value’ Operation to set the Username for logging in.
Set the first ‘Set Value’ parameters for the first as
Value: username
Target Element: This is the XPath discussed in the previous step
Element: Leave blank

Use the second ‘Set Value’ Operation to set the password for logging in.
Value: password
Target Element: This is the XPath discussed in the previous step
Element: Leave blank
Now you have set the login values, click the ‘Run’ button and test out if it works, if so, all that is left is clicking submit.
Make sure you select the Web task and not the Java task for setting values.
8. Clicking Submit
To finish logging on you need to add the Click operation from the web section of the toolbox.
Find the XPath for the click button, this can be done in the same way as for the text fields. Then set the Click operation parameters.
Target Element: Use the XPath for the click button
Element: Leave Blank
9. Run The Task
If everything has been filled out correctly you should have be taken to the login details page for facebook.
WELL DONE! YOU HAVE SUCCESSFULLY AUTOMATED A WEB BROWSER!